Tools needed:
- Hydraulic jacks(the more the better, I used two)
- 4 jack stands
- Ratchet with socket sizes 10mm, 12mm, and 13mm.
- 6 inch Ratchet extension
- Access to welder or someone who can weld
- Sugar (C6H12O6)
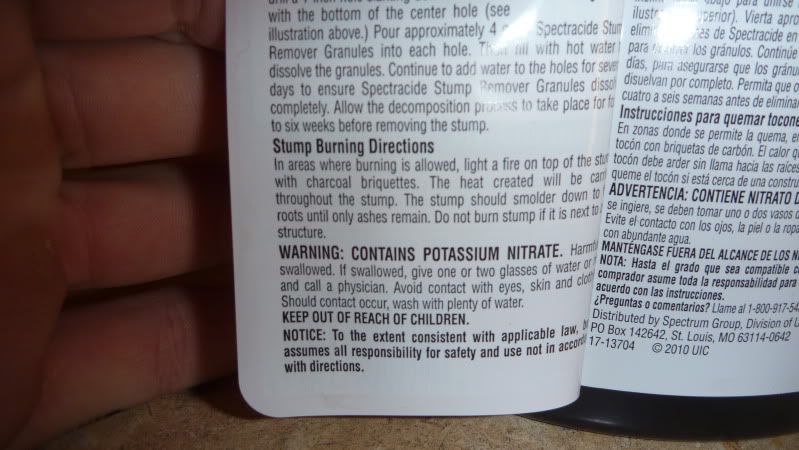
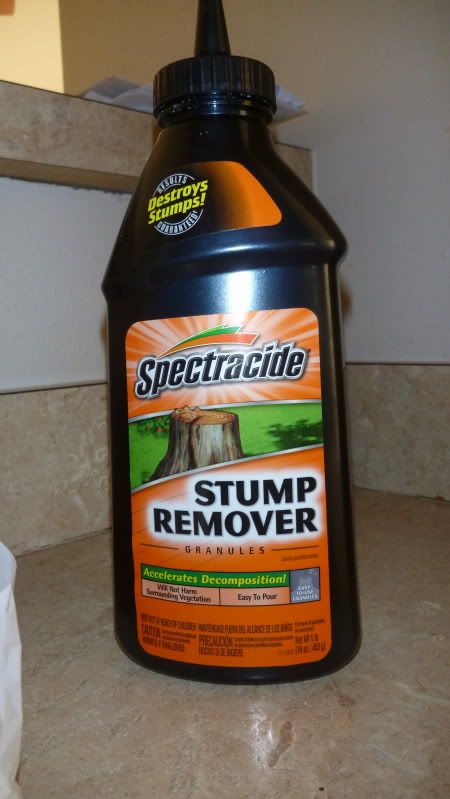
- Saltpeter(aka. Potassium Nitrate, KNO3) I found this at Lowes. See this picture and this picture
- Frying pan
- Aluminum foil
- Lighter
- Four plastic bags
- Four rubber bands
- Shop vac
- Support the exhaust so that when it is disconnected it will not fall on top of you.
- Remove the eight 12 mm bolts/nuts that connect the exhaust to the exhaust manifolds
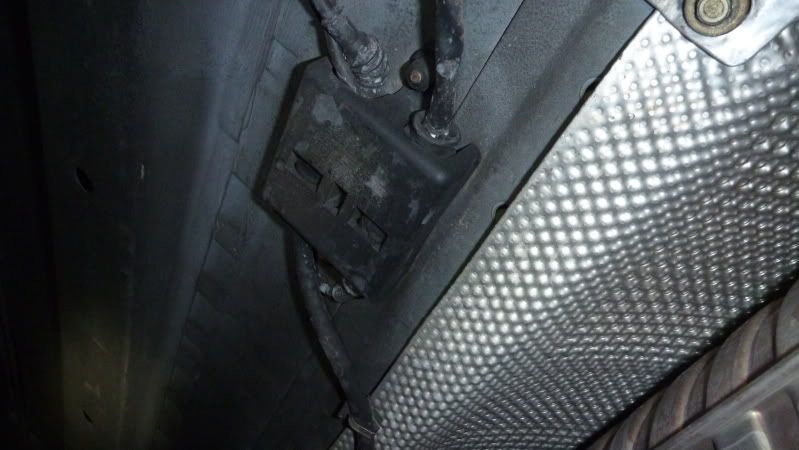
- Using a 10mm socket remove this black box on both sides of the car and unplug all four of the 02 sensors.
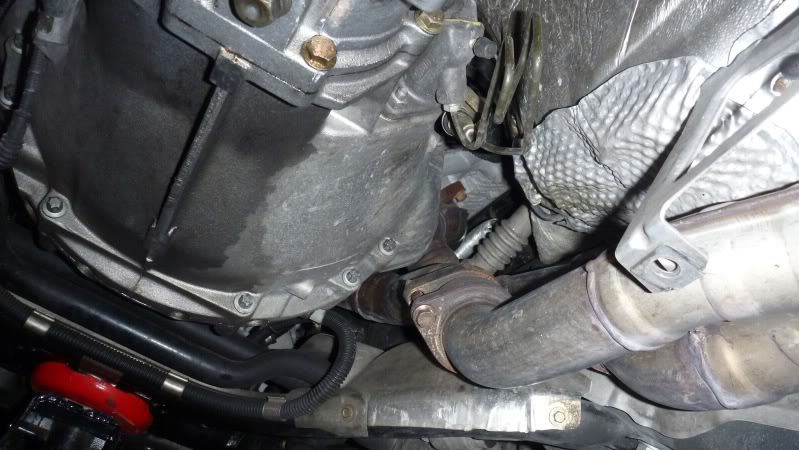
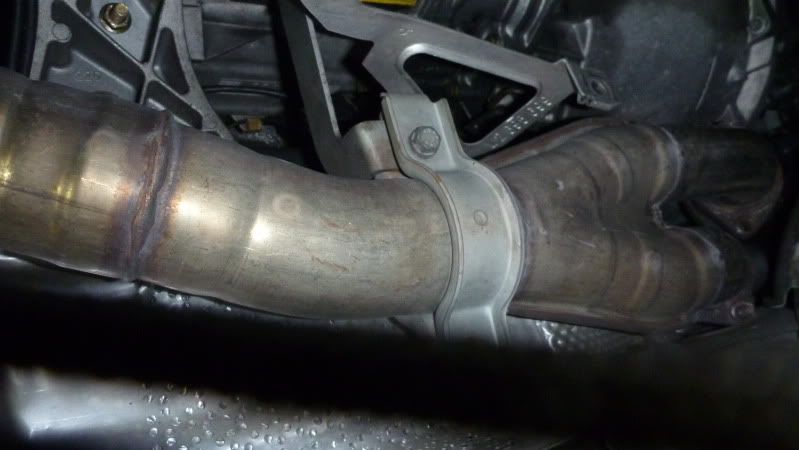
- Remove these clamps. They are 12 or 13 mm. There are two, one on the driver side and one on the the passenger side.
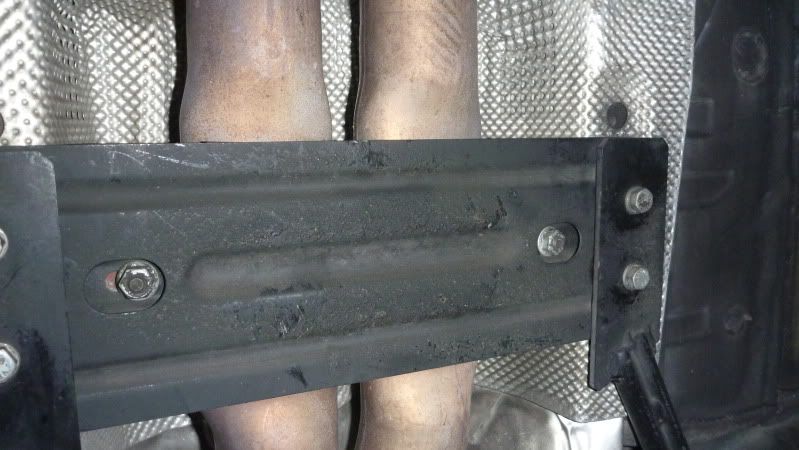
- Remove the two 12mm nuts in the center of this picture, then the four bolts on the outside.
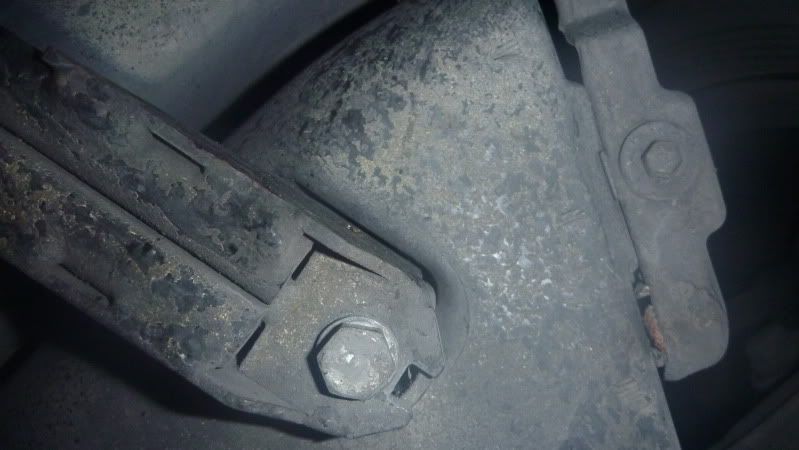
- In order to get the black brace out from under the exhaust you will have to loosen these two bolts from the braces near the rear of the car(12 or 13mm).
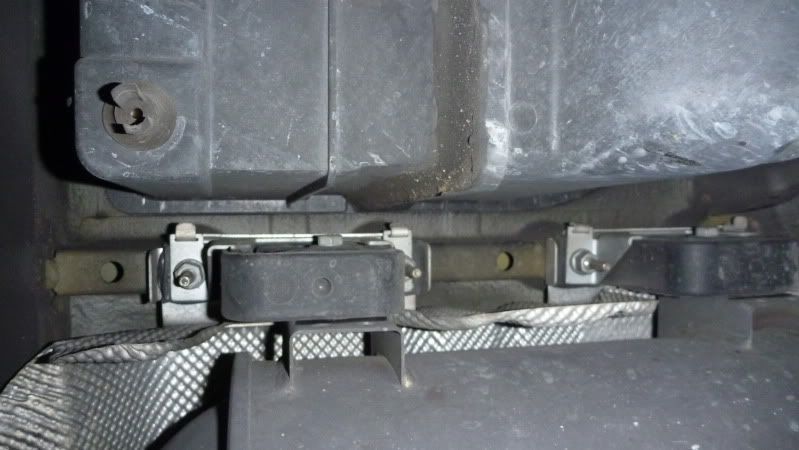
- Remove the twelve 12mm bolts that hold in the exhaust cans.
Your exhaust should now be completely out of the car. Roll it out from under the car.
Finding the leaks
- This part involves some science and is actually really fun. Start by mixing two tbsp of sugar with three tbsp of potassium nitrate.
- Put in a frying pan and heat over medium to high heat and it should start to look like this(crack):
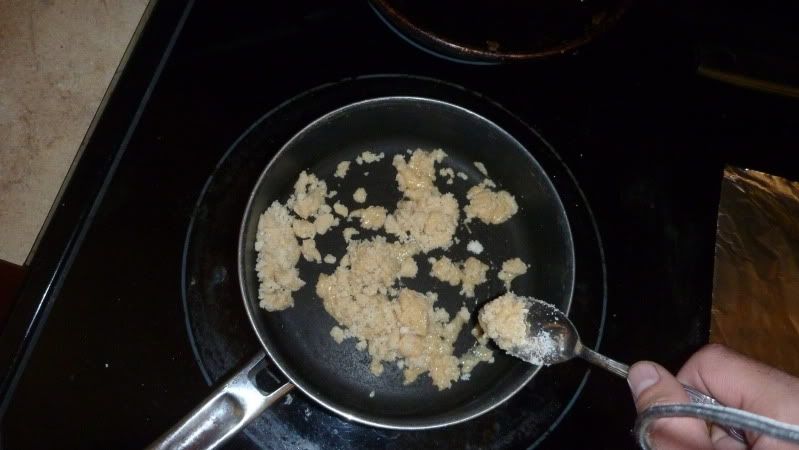
- Once it becomes a liquid dump it in to little cookies about three inches in diameter on to some foil and let it dry for a few hours. This will make you little smoke bombs. See smoke bombs in action:
- While I was waiting for it to dry I rigged up this apparatus:

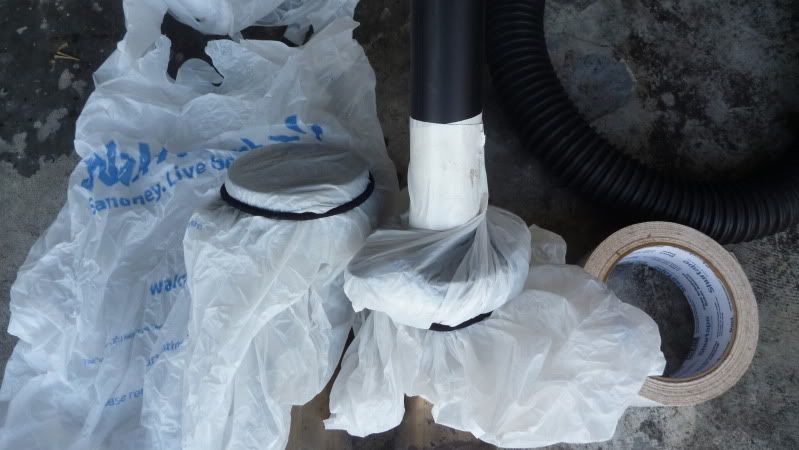

- I set my shop vac to blower mode and set a smoke bomb inside on a paver so it would not melt the bottom. I also removed the filter. Make sure your shop vac is clean so you don't fill your exhaust up with a bunch of debris.
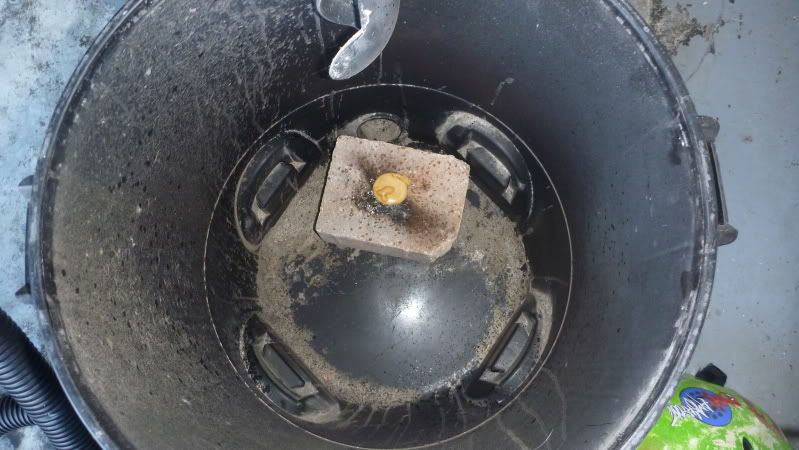
- Light the smoke bomb, turn your shop vac on, and you should be able to see the smoke come out the tail pipes and wherever you have a leak. This is a lot easier to do with two people, one to look for leaks and one to turn on the shop vac. I did it a few times with the shop vac hose on the passenger side, and a few times with the hose on the driver side.
I also covered up the tail pipes a few times to create more pressure and force smoke out of the smaller leaks. When I did this I had a couple plastic bags burst on me, so you might be better off using a thicker piece of plastic.
Fixing the leaks
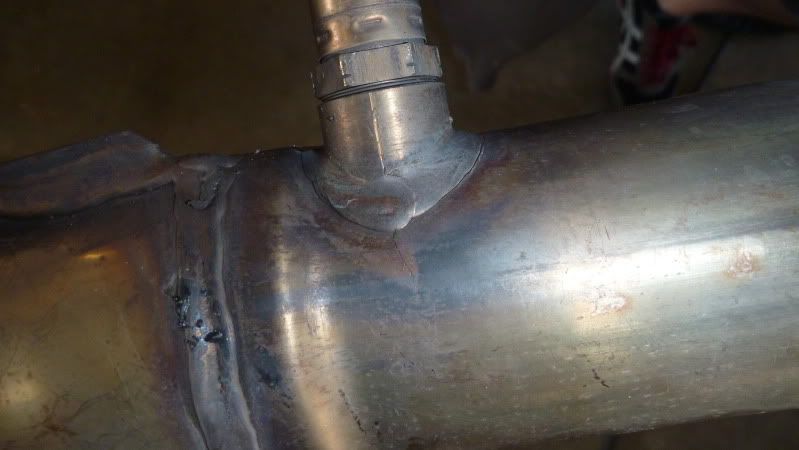
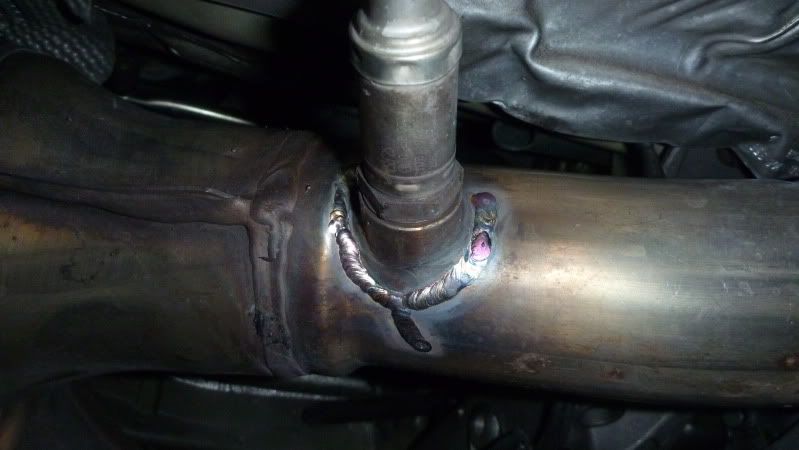
- Mark anywhere you find leaks. I had a few pinhole leaks in some of the factory welds, and cold lap around my 02 sensors. You can MIG or TIG weld this, but I much prefer TIG as cold lap is less common with it. Notice the cracking around the sensor:
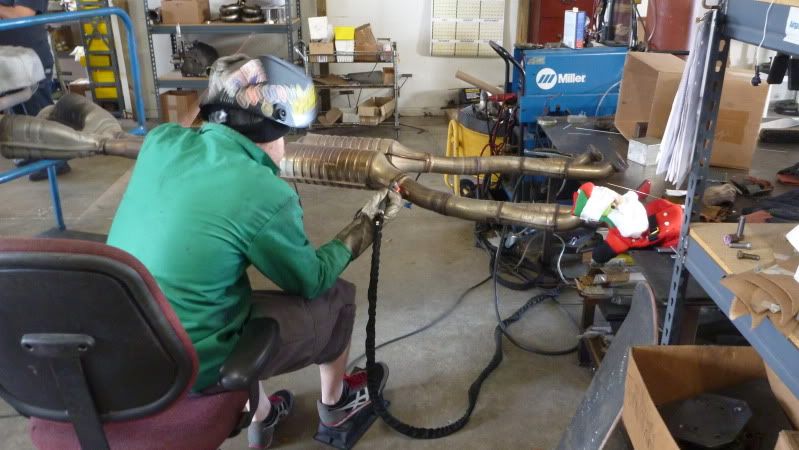
- Have a good friend weld it for you! (Note the stocking on the collector pipes for the Christmas spirit)
- Finished product:
- Reinstall exhaust and you're done.
Bonus: count how many skateboards were used in this write up for a free prize.